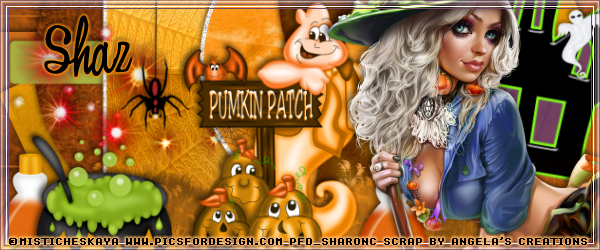
This tut was written for those with a basic knowledge of psp.
I am using the awesome artwork of Arthur Crowe.
You need a license to use this art work. Please do not use without a license.
You can find this art at his Store HERE
Supplies Needed
I used PSPX...but any of them should work.
Filters
Xero-Porcelain and Soft Vignette
Mura Meister-Copies
AAA Foto Frames
Xero-Porcelain and Soft Vignette
Mura Meister-Copies
AAA Foto Frames
Font of Choice, I used always forever
Drop Shadow usually V2 H2 50 black
Let's get started
*Remember to add your drop shadow as you go along*
Open a new image 800 x 800 or a size you prefer.
Paste paper 10, apply your mask, delete and merge group, resize as needed later for your tag.
Paste frame 2, click inside with your magic wand, expand by 5, paste paper 2 or one of your choice, invert, delete, do not deselect yet, past your middle side tube if using the same one I am, delete and select none, then mirror your tube.
Duplicate, go to Adjust, Blur, Gaussian blur at 4, change the blend mode to Overlay or Hard light, which ever you prefer.
Apply the Xero filter- Porcelain first and then
Vignette with these settings
Gradient Shape-Diagonal 1
Sharp checked, Foreground colors
Diagonal Dots
0, 0, 1, 255
Open frame 3, take your free hand tool, draw around the one curly on the bottom right of the frame, paste, flip and apply the Mura Meister filter-Copies on Encircle and then resize it larger to 115, move just above the mask layer.
Close off your mask layer and curly layer, merge visible, duplicate, resize to 50% and place down on the right side of your tag.
Now reopen your mask and curly layers.
Now on that same frame 3, (this is optional) erase it all but the pumpkins, being careful around the green stems, and place on the left side of your frame layer.
Paste the Sign and free rotate to the right at 20 degrees.
Resize the cupcake to 40%, place below the sign layer and move to the left.
Resize Halloween friends to 50%, place on the right more.
Resize the thorned candy corn to 35% and place on the right below the friends layer.
Resize the jack-o-lantern to 35%, place on the left side, duplicate, resize to 80% and place on the smaller frame picture on the right.
Resize the pumpkin cuppy to 35%, place behind the sign layer where you can see the eyes.
Resize the cartoon candy to 40%, place on the left below the sign layer.
Add any other elements you would like.
If you are going to do a Signature and Avator, do not merge just yet, wait until those are done before you merge this tag.
Then once happy with it all, close off any backgrounds, merge visible.

Resize first, then add your copyrights and name.
Signature tag
Open a new image 600 x 250, paste a paper of choice, I used paper 2.
Close off all the layers on your tag you just made except for the mask, frame, paper and tube inside frame, copy merge and paste in your new image, resize to 90%.
Now go back and open all the layers you just closed.
Copy and paste your tube, resize to 90% and place on the left side.
Paste the sign and resize to 50%, place by your tube.
Paste the pumpkin that was sitting on the small frame, move below the sign layer and adjust.
Copy the pumpkins that were cut from the other frame, place on the right side, resize to 70%, duplicate, mirror and move below your tube layer.
Resize the Halloween friends to 60%, place on the right side in front of the pumpkins.
Resize the thorned candy to 60%, place below the pumpkin layer and over a little bit to the left.
Resize the cartoon candy to 55%, mirror and place on top of the pumpkins on the right.
Resize the pumpkin cupcake with the eyes to 50%, place, duplicate and lower a little bit from the other one.
Once you have use the parts of this signature for your Avator, move the frame back in place and open your tube layer and merge visible, add frame of choice and add your copyright and name.
Frame I use was AAA-Foto Frame width 5 and Opacity at 70 for both the Signature tag and the Avator.
Avator depending on your forum or group for size.
I did this one 150 x 150
From your signature tag, close off your tube layer, move the frame layer over to the right a bit, then copy and paste into your new layer, resize to 90% and adjust to your liking, merge visible and add your copyright and name or initial and frame of choice.
That's it
Hope you enjoyed doing my tut.


