
This tut was written for those with a basic knowledge of psp.
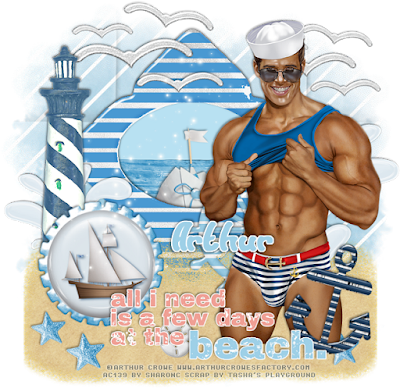
I am using the awesome artwork of Arthur Crowe.
You need a license to use this art work. Please do not use without a license.
You can find this art at his Store HERE
Supplies Needed
RR Mask Set 2_1 HERE
Font of Choice, I used Sunset Beach
Drop Shadow usually V2 H2 50 black
Let's get started
*Remember to add your drop shadow as you go along*
Open a new image 800 x 800 or one you prefer
Resize paper 3 to 90%, paste and apply your mask, delete and merge group.
Paste frame 01 and move up some, click inside with your magic wand, expand by
5, add a new raster layer and fill with #b8e1f2, move below the frame,
then paste element 28, invert, delete, select none.
Resize element 18, paste below the frame layer in the center.
Paste element 10 on the left above the frame layer and move up some.
Resize the sand to 110%, paste and move toward the bottom of the frame.
Resize element 23 to 90%, place on the left above the sand layer and to
hide the bottom part of the lighthouse.
Resize element 20 to 75%, place on the right side more.
Resize your tube to 70%, place on the right side.
Resize element 9 to 90%, place behind your tube layer on the right,
duplicate, mirror, resize to 80%, move below the lighthouse.
Resize element 12 to 80%, place on the frame more to the left side,
duplicate, resize to 80% again and move to the right below the tube layer.
Resize the wordart element 25 to 85%, paste above your tube layer by the legs.
Resize element 1 to 55%, free rotate to the right at 15, place on the right below
the wordart.
Resize element 16 to 45% place on the left side of the sand, duplicate, resize to 90% and place by the first one. Duplicate as many times as you like and place in different areas.
Resize element 15 to 25% and place where you like on the sand.
Paste element 3 on the top layer.
Once happy with it all, close off any backgrounds, merge visible.
Resize first, then add your copyrights and name.
Resize first, then add your copyrights and name.
That's it
Hope you enjoyed doing my tut.
No comments:
Post a Comment