Friday, February 26, 2016

St Patty Faery

 
This tut was written for those with a basic knowledge of psp.
I am using the awesome artwork of  Alicia Mujica.
You need a license to use this art work. Please do not use without a license.
 
 You can find this art at her Store  HERE
 
Supplies Needed
I used PSPX...but any of them should work.
 Scrap 50 Shades of Shamrocks by Tasha's Playground  HERE
Check out the rest of the blog HERE
Mask 27 by Angie Tagged Me HERE
Check out the rest of the blog HERE
 
 Font of Choice, I used leaf 1

Drop Shadow usually V2 H2 50 black
Use whatever drop shadow you prefer
 
 *Remember to add your drop shadow as you go along*

This is a quickie one

Open a new image 800 x 800 or one you prefer, paste paper 3,  resize your mask down to 85%, apply, delete and merge group.

Paste the scatters on the mask layer.

Paste the tree on the left side.
Paste the stairs in front of the tree.
Paste the grass in front of the stairs, move over some duplicate, mirror.

Resize your tube to 45%, place on the right side below one of the grass layers.
Paste flower 4 below the stairs on the left, duplicate, resize to 75%, move above the stairs on the left, duplicate, mirror, duplicate one of the flowers again, resize to 75%, place above the tube layer by the legs, erasing some of the stems.

Resize the hat to 50%, place on the grass on the left.
Resize the butterfly to 50%, mirror and move back to the left or place where you prefer.
Paste the mirror on the left side below the first flowers, take your free hand tool, draw around the mirror, resize your tube to 25%, mirror, paste, delete, select none, change the blend mode to overlay.

Resize coins to 25%, place on the right, duplicate and move over a bit.

Paste the sparkles a couple of times being on the top layer.

Resize shamrock #2 to 25%, duplicate once or twice and place on the grass where you like.

Resize scatter 2 to 40%, paste on the grass, below the hat, duplicate, mirror, move below the flower layer by the tube.

Add any other elements you would like, make it your own.

Crop your tag to be sure no stray shadows are on the edges of your tag.
Once happy with it all, close off any backgrounds, merge visible.
Resize first, then add your copyrights and name.
 
That's it
Hope you enjoyed doing my tut.

Wednesday, February 24, 2016

Cute Enough to Kiss


This tut was written for those with a basic knowledge of psp.
I am using the awesome artwork of  Barbara Jensen.
The tube is called Budding Beauty, this is one of her Retired tubes #42.
You need a license to use this art work. Please do not use without a license.
 
 You can find her art at her Store  HERE
 
Supplies Needed
I used PSPX...but any of them should work.
 Scrap  XOXO by Lorenzen Design  HERE
Check out the rest of the blog HERE
Mask WSL_84  HERE
Filters
EyeCandy4000-Chrome-Gradient Glow
Screen Works-Light Gauze

Font of Choice, I used Close to You

Drop Shadow usually V2 H2 50 black
Drop shadow on this one I used V-2 H-2 Blur 15
Use whatever drop shadow you prefer
 
 *Remember to add your drop shadow as you go along*

Open a new image 800 x 800 or one you prefer, paste paper 23, apply your mask, delete and merge group.

Paste frame 6, apply EyeCandy 4000-Chrome with these settings
Reflection Map-Outdoor.tif
16.65, 25, 50 ,0, 72
Inside marquee checked
Lighting 135, 45
Highlight brightness and size-100, 40
Go to Adjust, Hue and Saturation, colorize
Hue 57, Saturation 48
Then apply a fat white gradient glow 3, 25, 100
Click inside with your magic wand, expand by 5, paste paper 1, invert, delete, move below the frame. 
Then paste your tube, delete, select none, duplicate, mirror.

Paste your tube on top of the frame in the center so you can adjust the others better, erase some of the legs at the bottom.
Merge the tubes in the frame now, duplicate, go to Adjust, Blur, Gaussian blur at 4, change the blend mode to screen, apply the Screen Works filter-Light Gauze, merge down.
Resize rose 1 to 35%, paste at the bottom of the tube, duplicate, mirror, duplicate, resize to 75%, move over some and below the first rose layer, duplicate, mirror.
Duplicate again, resize to 75%, move down, duplicate and mirror.

Resize leaf 3 to 35%, paste below the roses, duplicate, mirror, duplicate the one on the right, free rotate to the left at 90, resize to 75%, place on the left side below the other leaf layer, duplicate, mirror.

Being on the top layer, paste Butterfly 1, free rotate to the right at 35, resize the butterflies to 35%, place on one side, duplicate, mirror.

Resize rose 3 to 40%, paste on the right below the greenery, duplicate, mirror.

Resize doodle 2 to 35%, paste below the paper layer of the frame on the upper right, duplicate, mirror, duplicate, flip, duplicate, mirror.
Paste doodle 3 on the mask layer, adjust, erase the part on the right that sticks way out, duplicate, mirror, flip, adjust.
Resize flower 3 to 25%, paste at the top of the frame by the doodles below the tube layer, duplicate, mirror.
Resize flower 4 to 20%, paste offset on flower 3, duplicate, mirror.
Paste wordart 9 on top of the flower layers, add a fat white gradient glow.

Resize the bee to 35%, paste on the right side, apply a fat green gradient glow, duplicate, resize to 75%, mirror and move up just a bit.
Resize the perfume bottle to 35%, place below the bee layer on the right.

Resize the heart string to 85%, free rotate to the left, place below the greenery at the bottom.

Resize lips 3 to 20%, free rotate to the left at 20, paste on the left side on the flowers.
Resize hearts 2 to 85%, paste below the greenery at the bottom.

Add any other elements you would like, make it your own.

Crop your tag to be sure no stray shadows are on the edges of your tag.
Once happy with it all, close off any backgrounds, merge visible.
Resize first, then add your copyrights and name.
 
That's it
Hope you enjoyed doing my tut.

Monday, February 22, 2016

So Lucky

This tut was written for those with a basic knowledge of psp.
I am using the awesome artwork of  Kajenna.
The tube is called lucky
You need a license to use this art work. Please do not use without a license.
 
 You can find this art at PFD Store  HERE
 
Supplies Needed
I used PSPX...but any of them should work.
 Scrap  Feeling Lucky by Manipulated By Magik  HERE
Check out the rest of the blog HERE
Mask WSL_84  HERE
Filters
penta.com-Dot and Cross
xero-Porcelain
Unplugged Tools-Interlace
EyeCandy4000-Gradient Glow

Font of Choice, I used Celtic

Drop Shadow usually V2 H2 50 black
Drop shadow on this one I used V-2 H-2 Blur 15
Use whatever drop shadow you prefer
 
 *Remember to add your drop shadow as you go along*

Open a new image 800 x 800 or one you prefer.
Paste paper 4 or one of choice, apply your mask, delete and merge group.
Paste frame 5, resize to 90%, free rotate to the left at 10, duplicate, mirror, move both frames, one to the left, the other to the right until they are how you like them, then merge down.
Duplicate the frame, change the blend mode to Burn, merge down, then apply the filter
penta.com-Dot and Cross
72, 10, 2
Select your magic wand, click inside the frames, expand by 5, paste paper 2, invert delete, move below the frame.
Resize your tube to 40%, paste on the right frame, mirror the original tube and paste in the left frame, delete both, select none, merge down.
Duplicate the tubes in the frame, Gaussian blur at 4, change the blend mode to Screen.
Apply the xero filter-Porcelain and then
Unplugged Tools-Interlace with these setting 4, 24, 2, 4

Resize your tube to 33%, paste in the center on top of the frame layer.

Paste the paint splatter on the mask layer at one side, duplicate, flip, duplicate, mirror, duplicate flip and adjust all to fit your tag better.

Paste the glitter layer under your tube layer, duplicate, mirror.

Resize the mouse to 50%, mirror, paste above your tube layer on the right.
Resize the balloons to 50%, place below the mouse and make it look like he is holding them by the hand.

Resize the coin to 30%, place under the mouse, duplicate twice and move below the tube layer and one off to the right more and the other to the left more.

Resize the word lucky to 70%, paste at the bottom, apply the penta.com-Dot and Cross and then add a fat white gradient glow with EyeCandy 4000-Gradient Glow

Paste the sparkle above the paint splatters, duplicate, mirror and adjust.

Resize the leprechaun on a horseshoe to 40%, place on the left below the wordart.
Resize the goodie bag to 50%, place on the left below the tube layer.
Resize the clover scatter to 50%, place on one side of the frame layer, duplicate, mirror.
Resize the winged shamrock to 50%, place on the upper left on the frame.

Resize bow 3 to 50%, paste on the upper right corner of the frame.

Add any other elements you would like, make it your own.

Crop your tag to be sure no stray shadows are on the edges of your tag.
Once happy with it all, close off any backgrounds, merge visible.
Resize first, then add your copyrights and name.
 
That's it
Hope you enjoyed doing my tut.

Wednesday, February 17, 2016

Lucky

This tut was written for those with a basic knowledge of psp.
I am using the awesome artwork of  Alicia Mujica.
You need a license to use this art work. Please do not use without a license.
 
 You can find this art at her Store  HERE
 
Supplies Needed
I used PSPX...but any of them should work.
 Scrap Lucky Enough by Horseplays Pasture Design  HERE
Check out the rest of the blog HERE
WSL_Mask 84 HERE
 
 Font of Choice, I used Celtic

Drop Shadow usually V2 H2 50 black
Use whatever drop shadow you prefer
 
 *Remember to add your drop shadow as you go along*

Open a new image 800 x 800 or one you prefer, paste paper 4, apply your mask, delete and merge group, resize larger to 105%, then paste paper 1, apply the mask again, merge down.
Paste the wire on the mask, change the blend mode to Luminance (L).

Paste frame 8 on the wire layer, resize larger to 110%.

Paste frame 4, click inside with your magic wand, expand by 5, paste paper 3, invert, delete, select none, move below the frame.

Being on the top frame layer, resize your tube to 45%, paste on the right side.

Paste the Gold at the bottom, duplicate twice, move one over to the right and the other over to the left.

Paste the word Luck on top of the gold layers.
Resize the horseshoe to 45%, free rotate to the right at 20 degrees, duplicate, mirror, moving both below the gold layers.

Corner flower line, free rotate at 90 to the left, move to the bottom below the tube layer.

Paste flower 3 below the corner flower layer on the right, duplicate, mirror, move down some and erase any stem showing below.
Resize flower 1 to 85%, paste on the paper layer below the window, sharpen once.
Resize the original flower 1 to 70%, paste above flower 3 layer on the left, sharpen once, duplicate, mirror.


Resize the leaf vine to 25%, paste below the corner flower layer on the left, duplicate, mirror, duplicate again and move over some.

Resize the dragonfly to 30%, place where you like, duplicate and mirror and place again where you like.

Resize clover 1 to 20%, paste on the gold coins, duplicate a couple of times, place where you like.

Resize the bird to 30%, place where you like, I placed mine on the wordart.
Resize the butterfly to 15%, free rotate to the left at 25, place where you like, duplicate, mirror.

Resize ribbon 2 to 80%, free rotate to the left at 90, place below the gold coins at the bottom, duplicate, mirror, move up some.

Resize bow 4 to 15%, place on the letter K of the wordart.

Add any other elements you would like, make it your own.

Crop your tag to be sure no stray shadows are on the edges of your tag.
Once happy with it all, close off any backgrounds, merge visible.
Resize first, then add your copyrights and name.
 
That's it
Hope you enjoyed doing my tut.

Sunday, February 14, 2016

I Can Dream About You

 This tut was written for those with a basic knowledge of psp.
I am using the awesome artwork of  Keith Garvey.
The tube is called Edgy Marilyn.
You need a license to use this art work. Please do not use without a license.
 
 You can find this art at his Store  HERE
 
Supplies Needed
I used PSPX...but any of them should work.
 Scrap Dreaming of You by Kittz Kreationz  HERE
Check out the rest of the blog  HERE
 Brutal Designs Valentine Mask HERE
Check out the rest of her blog HERE
Filters
xero filter-Soft Mood
EyeCandy4000-Gradient Glow

  Font of Choice, I used Yaquote Script

Drop Shadow usually V2 H2 50 black
 *Remember to add your drop shadow as you go along*

Open a new image 800 x 800 or one you prefer, new layer, fill with #ffa7a9, apply your mask, delete and merge group, adjust to fit your tag.

Paste element 49, click inside with your magic wand, expand by 5, paste paper of choice, I used #2. invert, delete, move below the frame, do not deselect yet.
Mirror your middle size tube, paste more to the left, delete, select none.
Duplicate, go to Adjust, Blur, Gaussian blur at 4, change the blend mode to overlay or one you prefer, merge down.

Resize element 35 to 90%, paste below the paper layer of the frame, duplicate, free rotate to the left at 20 degrees, duplicate, mirror, move the two rotated ones below the first film strip, erase the parts showing in the top film strip.
Once you have everything erased, go on the top film strip and merge each one down.
Then click inside with your magic wand, expand by 5, new layer, fill with #ffa7a9, paste your tube on one side, invert, delete, select none, duplicate and mirror, merge down, then move both the color layer and the tube below the film strip,
 change the blend mode to Luminance (L).
Apply the xero filter-Soft Mood.

Resize your tube to 85%, paste on the right side.

Paste element 48 at the bottom of your tube, add a fat white gradient glow.
Resize element 20 to 55%, place on the right above the wordart layer.
Resize element 28 to 60%, place on the left side, below the wordart.
Resize element 6 to 65%, place at the top, below the paper layer of the heart.
Resize the CU Bottle Sample to 50%, place on the left side below your tube layer.
Resize element 51 to 50%, place below the cupcake layer on the left.

Resize element 31 to 50%, place on each side below the cupcake layer, duplicate and move up a bit behind your tube layer on the right, duplicate again and move up to the top just above the heart layer.

Paste element 12 below the paper layer of the heart frame at the top, duplicate, flip.

Resize element 11 to 35%, free rotate to the left at 20, place where you like.
Paste element 36 below the wordart at the bottom and erase on each side the part you do not want.
Resize element 16 to 50%, place where you like, duplicate, mirror and move up.

Add any other elements you would like, make it your own.

Crop your tag to be sure no stray shadows are on the edges of your tag.
Once happy with it all, close off any backgrounds, merge visible.
Resize first, then add your copyrights and name.
 
That's it
Hope you enjoyed doing my tut.

Friday, February 12, 2016

Irish Girls Rock Forum Set


This tut was written for those with a basic knowledge of psp.
I am using the awesome artwork of Arthur Crowe.
You need a license to use this art work. Please do not use without a license.
Tube is called St Patrick Babe
 
You can find his art at his store HERE
 
Supplies Needed
I used PSPX...but any of them should work.
Andrew Filters #44-Fabric Wrapper
Mura Meister-Copies
Xero Filter-Radiance
UnPlugged Tools-Interlace

Font Worstveld for name
Oh la la for pixel workart
 
Drop Shadow usually V2 H2 50 black or
whatever one you prefer

Let's get started
*Remember to add your drop shadow as you go along*

I took an old tut I did and revamped it.

Open a new image, 600 x 250 and fill with color of choice, I used #7eac7d.
 
Paste your tube and apply Mura Meister-Copies-Wallpaper rotate at default settings.

Apply Andrews Filter #44-Fabric Wrap at default settings.

Then go to Adjust, Blur, Radial Blur with these settings
Twirl, 50, 10 0, 0, 10, Elliptical checked.
Then apply Andrew Filter #44 again, change the blend mode to overlay.
Now apply Unplugged Tools-Interlace with these settings, twice.
5, 20, 1, 0

Take your selection tool and draw out a small rectangle about half way across, add a new raster layer and fill with #56944c, Effects, Edge effects, enhance, select none.

Type out your wording of choice, I typed out Irish Girls Rock, using Oh la la for the wording, set on 10 Pixels and the Bold button pushed in, merge down, duplicate and move one to the left side top and the other to the right side bottom.

Paste your full tube and move below the rectangle layer, duplicate and move to the other side, merge these together, change the blend mode to overlay or one you prefer, apply Mura Meister Copies-*Line, with the 1/n Fade out checked.
Apply xero filter-Radiance.

Paste your medium size tube in the center and adjust to your liking.
Duplicate, gaussian blur at 4, change the blend mode to overlay, merge down, then merge visible and add AAA Frames-Foto frame with these settings
4, 0, 0, 3,
0, 0, 0, 50
Add your copyright and name.

For the Avator
Open a new image 150 x 150 or a size of your choice.
Paste your tag and resize to 70% and place how you like it.
Apply the AAA Frames-Foto frames with same settings as before.
Be sure all copyrights have been added to your tag.
Add your name and that is it

Hope you enjoyed doing this tut.

Here is the original I did back in Feb 23, 2013 using Danny Lee when he was at Scrap and the City.
Now you can find his art at Scraps N Company HERE


Wednesday, February 10, 2016

In The Pink

 This tut was written for those with a basic knowledge of psp.
I am using the awesome artwork of  Alehandra Vanhek.
Tube is called honey.
You need a license to use this art work. Please do not use without a license.
 
 You can find this art at PFD Store  HERE
 
Supplies Needed
I used PSPX...but any of them should work.
 Scrap Pinksplotion  by Melissaz Creationz  HERE
Check out the rest of the blog HERE
MPM Mask 7  HERE
Check out the rest of her blog HERE

Font of Choice, I used Amaldemo

Drop Shadow usually V2 H2 50 black
Drop shadow on this one I used V-2 H-2 Blur 15
Use whatever drop shadow you prefer
 
 *Remember to add your drop shadow as you go along*

Open a new image 800 x 800 or one you prefer, paste paper 13, apply your mask, delete, merge group.

Paste element 12, flip, move to the top left, duplicate, mirror, adjust. Add a drop shadow a bit darker than this element. Add noise at 35% on both.

Paste element 17 on the right and up some, duplicate, move over to the left and down some.

Paste element 43 at the bottom right, duplicate, mirror, adjust.

Resize your tube to 45%, if using the same one, paste in the center.

Paste element 36 on the left above the tube layer.

Paste element 10 behind the tube layer, flip and move up.

Resize element 35 to 50%, place by the car.
Resize element 34 to 50%, place below the shoe layer on the right.
Resize element 33 to 60%, place on the right, duplicate and move up a bit.
Resize element 41 to 50%, place by the glasses.
Resize element 29 to 45%, place by the glasses.
Resize element 37 to 40%, place by the shoes.
Resize element 38 to 40%, place where you like.

Resize element 26 to 60%, place on the left below the car, duplicate, mirror, move below the tube layer.
Resize element 15 to 50%, paste on the left below the car layer, duplicate, mirror.

Resize element 39 to 50%, paste at the upper left side, free rotate to the left at 10 degrees.
Paste element 16 at the bottom on the mask layer.

Add any other elements you would like, make it your own.

Crop your tag to be sure no stray shadows are on the edges of your tag.
Once happy with it all, close off any backgrounds, merge visible.
Resize first, then add your copyrights and name.
 
That's it
Hope you enjoyed doing my tut.

Sunday, February 7, 2016

Sweet Love


This tut was written for those with a basic knowledge of psp.
I am using the awesome artwork of  Verymany.
The tube is called Vampire.
You need a license to use this art work. 
 Please do not use without a license.

You can find this art HERE
 
Supplies Needed
I used PSPX...but any of them should work.
Scrap Sweet Heart by Heather Devine Dezigns  HERE
You can check out her blog HERE
DD Valentine Mask_7 HERE
Check out the rest of her blog HERE
 Filters
Mura Meister Copies-Encircle

Font of Choice, I used Amaldemo

Drop Shadow usually V2 H2 50 black
Use whatever drop shadow you prefer
 
 *Remember to add your drop shadow as you go along*

Open a new image 800 x 800 or one you prefer, paste paper 2, apply your mask, delete, merge group.
Paste element 12, duplicate, resize to 50%, duplicate, move one to the upper left and the other to the lower right, erase any part of the larger frame showing in both of the smaller frames, close off mask and merge visible, reopen mask now.

Click inside with your magic wand, expand by 10, paste paper 13, invert, delete, move below the frames, paste your tube in the small heart, delete, mirror your tube and paste in the other heart, delete, select none.
Erase any parts showing in the large heart, merge these 2 tubes together, duplicate, Gaussian Blur at 5, change the blend mode to hard light.

Paste your tube in the center heart, move below, duplicate, move above, erase the parts you do not want showing on both tubes.

Resize element 75 to 65%, apply Mura Meister Copies-Encircle with the first number on 25, place on the mask layer.
Resize element 8 to 60%, apply Mura Meister Copies-Encircle with the first number on 20, paste on top of the other circle you just made.

Paste element 86, resize larger to 135%.

Resize element 8 to 50%, paste on top of the frame layer on one side, duplicate, move to the other side, erase some of the ribbon on the one on the right side. Duplicate the one on the right and move down some and under the paper layer of the frames.

Resize element 65 to 60%, free rotate to the right at 15 degrees, paste on the right side, above the frame layer.
Resize element 8 to 50%, free rotate to the right at 90 degrees, place by the corset, duplicate, mirror, move above the boxes.

Resize element 64 to 75%, paste at the bottom part of the frame, being on the top layer.
Paste element 9 on the box layer.

Resize element 43 to 75%, paste on the left side.
Resize element 66 to 55%, paste by the champagne bottle, duplicate and move over and up a bit.
Resize element 63 to 50%, paste on the left side below the champagne and glass layers.
Resize element 62 to 50%, paste by the other boxes.
Resize element 89 to 50%, paste on the top layer at the bottom, about center.

Resize element 26 to 25%, duplicate a couple of times and place them where you like.

Resize element 48 to 50%, place on one side, duplicate, mirror, adjust both to your liking.

Resize element 47 to 25%, place on the boxes on the left.

Resize element 53 to 50%, paste just above the corset on the right.

Add any other elements you would like, make it your own.

Crop your tag to be sure no stray shadows are on the edges of your tag.
Once happy with it all, close off any backgrounds, merge visible.
Resize first, then add your copyrights and name.
 
That's it
Hope you enjoyed doing my tut.

Thursday, February 4, 2016

Wonders


This tut was written for those with a basic knowledge of psp.
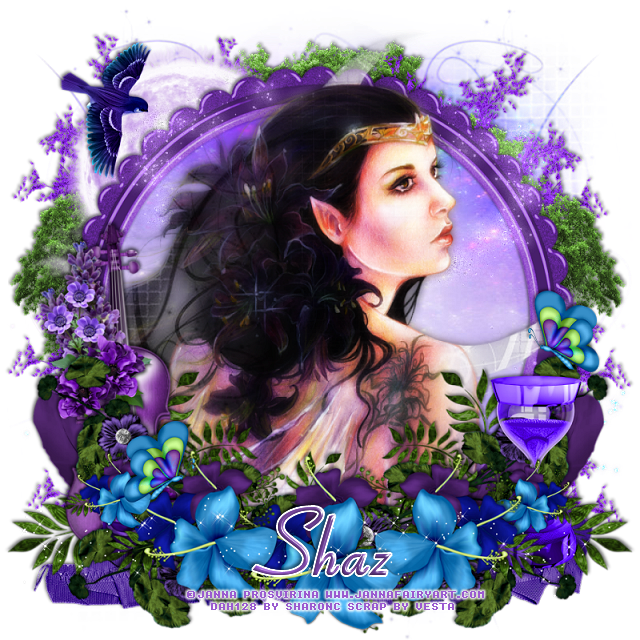
I am using the awesome artwork of  Janna Prosvirina 
The tube is called Estela
You need a license to use this art work. Please do not use without a license.
 
 You can find this art at Digital Art Heaven Store  HERE
 
Supplies Needed
I used PSPX...but any of them should work.
Scrap Midsummer Dream by Vesta's Visions  HERE
Check out the rest of the Blog HERE
MPM Mask 7 HERE
Check out the rest of her blog HERE 
 
Font of Choice, I used Aspire

Drop Shadow usually V2 H2 50 black
 *Remember to add your drop shadow as you go along*
 
Open a new image 800 x 800 or one you prefer.
Paste paper 13, enlarge the mask first up to 125%, apply, delete, merge group.

Paste frame 3, resize to 95%, go to Adjust, Hue and Saturation, colorize,
Hue 194, Saturation 150
Duplicate, mirror, erase some on the left side, so both sides looks the same, merge down, click inside the frame, expand by 5, paste paper 13, invert, delete, move below the frame, select none.

Paste your tube on top of the frame, apply the same mask, delete, merge group, duplicate the tube, go to Adjust, Blur, Gaussian blur at 5, change the blend mode to hard light, merge down, erase the part of the tube over the bottom of the frame.

Resize element 9 to 75%, paste on one side at the bottom of the frame, duplicate, mirror.
Resize element 19 to 65%, paste on one side, duplicate, mirror.
Paste element 27, free rotate to the left at 55%, move down, duplicate, mirror.
Resize element 5 to 55%, place in the center, duplicate, resize to 85%, move over, duplicate, mirror, duplicate again, resize to 50%, move to one side, duplicate, mirror.

Paste element 23 on the frame layer at the bottom.

Resize element 21 to 50%, place on the right below some of the greenery.
Resize 51 to 80%, place on the left just above the feather layer.

Paste element 42 below the paper layer of the frame at the upper left.

Resize element 26 to 35%, mirror, paste up by the moon on the left.

Paste element 53 on the mask layer, duplicate a few times and arrange around the frame the way you like.
Paste element 54 above the purple tree layer and do the same, duplicate and arrange how you prefer.

Paste Sparklies 3 above the frame layer on one side, duplicate mirror, change the blend mode to Luminance (L).

Paste Sparklies 1 on the top layer of the flowers.

Resize element 2 to 25%, duplicate, place where you like them.

Add any other elements you would like, make it your own.
 
Crop your tag to be sure no stray shadows are on the edges of your tag.
Once happy with it all, close off any backgrounds, merge visible.
Resize first, then add your copyrights and name.

 That's it
Hope you enjoyed doing my tut.

Wednesday, February 3, 2016

Be My Valentine

 
This tut was written for those with a basic knowledge of psp.
I am using the awesome artwork of  Keith Garvey.
The tube is called So Sweet.
You need a license to use this art work. Please do not use without a license.
 
 You can find this art at his Store  HERE
 
Supplies Needed
I used PSPX...but any of them should work.
 Scrap Paper Roses by Digicats (and Dogs)   HERE
Check out the rest of the blog  HERE
 DD Valentine Mask 7 HERE
Check out the rest of her blog HERE
Filters
Screen Works-Light Gauze
Mura Meister Copies-Encircle

  Font of Choice, I used Xiomara

Drop Shadow usually V2 H2 50 black
 *Remember to add your drop shadow as you go along*

Open a new image 800 x 800 or one you prefer, paste paper 1, apply your mask, delete and merge group.

Paste frame 1, resize to 85%, duplicate, resize to 55%, duplicate and move one down on each side, erase the bigger frame that is showing in the smaller frames.

Take your free hand tool, draw around the 3 frames, paste paper 3, invert, delete, move below the frames, do not deselect yet.
Now paste your smaller size tube in the smaller frames, mirror one before you paste it, delete, then paste your middle size tube just above the bigger frame, delete, select none.
Erase the part of the larger tube showing in the smaller tubes, then paste your tube again above the larger frame and erase the parts you do not want showing.

Merge the smaller tubes together, duplicate, Gaussian blur at 5, change the blend mode to screen, apply the Screen Works Filter-Light Gauze, merge down.

Resize leaf 2 to 65%, apply the Mura Meister Copies-Encircle, change the first number to 30, paste on the mask layer.
Resize the Love Lock to 55%, apply Mura Meister Copies-Encircle, number on 20, place on the the leaf layer.
Take the Love Lock again, flip it and apply the Mura Meister to this one also, place above the first one.

Being on the top layer, paste Ribbon 02.

Resize the cupcake, the bear and the heart shape box to 50%, place at the bottom how you like.
Resize the Love Letter to 35%, free rotate to the left at 15, place on the left below the other layers.
Resize the Paper Roses to 45%, free rotate to the right, place at the bottom, how you like, duplicate 3 or more times, mirror a couple of them, adjust to your liking, moving a couple down another layer or so. I also placed a couple up at the top of the smaller frames, erasing and part I did not want showing.

Resize the sparkle layer to 90%, paste on the top layer,  duplicate, mirror, adjust and erase any part you do not want on the faces.

Resize Ribbon 2 to 45%, place at the top below the tube layer, duplicate, mirror, adjust behind the tube.

Add any other elements you would like, make it your own.

Crop your tag to be sure no stray shadows are on the edges of your tag.
Once happy with it all, close off any backgrounds, merge visible.
Resize first, then add your copyrights and name.
 
That's it
Hope you enjoyed doing my tut.

Monday, February 1, 2016

Dreaming the Dream


 This tut was written for those with a basic knowledge of psp.
I am using the awesome artwork of  Di_Halim.
This is an Exclusive at PFD called Anna.
You need a license to use this art work. Please do not use without a license.
 
 You can find this art at PFD Store  HERE
 
Supplies Needed
I used PSPX...but any of them should work.
 Scrap Dreamscape by Melissaz Creationz  HERE
Check out the rest of the blog HERE
MPM Mask 7  HERE
Check out the rest of her blog HERE

Font of Choice, I used Amaldemo

Drop Shadow usually V2 H2 50 black
Drop shadow on this one I used V-2 H-2 Blur 15
Use whatever drop shadow you prefer
 
 *Remember to add your drop shadow as you go along*

Open a new image 800 x 800 or one you prefer.
Paste paper 2, apply your mask, delete and merge group, apply mask again, delete and merge group. This helps to eliminate the straight line at the top.

Paste element 02 and move to the bottom.
Paste element 33, move below the wordart, duplicate, mirror, adjust.

Resize element 28 to 90%, paste below the grass layers.

Resize element 09 to 70%, paste on the right side above the mask layer, change the blend mode to Luminance (L).
Click inside with your magic wand, expand by 5, paste paper 05, invert, delete, move below the frame, then mirror your tube, paste, delete, select none.
Duplicate your tube, Gaussian blur at 5, change the blend mode to screen or
one you prefer.

Paste element 11 below the paper layer of the frame and up on the right top.

Resize your tube to 43%, place on the wordart.

Element 30, free rotate to the left at 25 degrees, paste on the left below the fence layer.
Duplicate the sparkle layer, resize to 40%, place behind the tower.
Resize element 08 to 50%, place below the tube layer at the top by the tower, duplicate, mirror, erase the ones you do not want.

Paste element 24 on the right below the fence layer, duplicate, resize to 50%, move above the fence layer, duplicate again, mirror.

Resize element 40 to 35%, place in front of the wordart, duplicate a couple of times and place how you like, duplicate a couple more times and move below the wordart how you like.
Paste element 13 on top of the wordart.

Resize element 51 to 55%, place on the right above the tube layer.
Paste element 15 below the tube layer on the left.

Resize element 20 to 20%, place around the flowers how you prefer, duplicate, mirror and adjust.
Resize element 14 to 30%, place where you like, duplicate, mirror, move back to the right, duplicate again and place on the lower left.

Paste element 16, free rotate to the right at 90 degrees, place on the wordart and grass area.

Resize element 21 to 45%, mirror, place on the right on the wordart.

Resize element 01 to 50%, place on the right below the flower by the key.

Add any other elements you would like, make it your own.

Crop your tag to be sure no stray shadows are on the edges of your tag.
Once happy with it all, close off any backgrounds, merge visible.
Resize first, then add your copyrights and name.
 
That's it
Hope you enjoyed doing my tut.

Pimptress


This tut was written for those with a basic knowledge of psp.
I am using the awesome artwork of  Fidorova_Maria.
You need a license to use this art work. Please do not use without a license.
  You can find this art at PFD Store  HERE
 
Supplies Needed
I used PSPX...but any of them should work.
 Scrap Pimptress by Kristen-Toxic Desirez  HERE
Scroll down until you see the kit Pimptress
Check out the rest of the blog HERE
MPM Mask 7  HERE
Check out the rest of her blog HERE

Filter
Mura Meister Copies-Tiling (angle)

 Font of Choice, I used Magnolia Light

Drop Shadow usually V2 H2 50 black
Drop shadow on this one I used V-2 H-2 Blur 15
Use whatever drop shadow you prefer
 
 *Remember to add your drop shadow as you go along*

Open a new image 800 x 800 or one you prefer.
Paste paper 5, make larger to 115%, apply your mask,  delete, merge group.
As always adjust your mask to fit your tag how you prefer.

Resize your tube to 30%, place on the right side.
Paste the car on the left side above the tube layer, erase any part of the tube showing below the car.

Paste the city scene below the tube layer.
Paste the sparkles on the city scene.
Paste the moon below the tube layer on the left.
Paste the Pimptress Beaded String 1 at the bottom above the car layer.

Resize ring 1 to 40%, place on the beaded wordart at the right side.
Resize ring 2 to 40%, place by the first ring.

Resize the dollar sign to 80%, place on the upper left side, below the city scene.

Resize the shoe to 35%, paste by the car on the left, duplicate, mirror, move back to the left below the first shoe.
Resize lips 2 to 45%, place at the upper right below the tube, lower the opacity to 65%.
Resize the whip to 45%, place on the left side by the shoes above the wordart layer.
Resize the comdom to 50%, place on the left below the whips and shoes.

Resize the crown to 25%, free rotate to the right at 15 degrees, place by the rings on the right.

Resize the tickler to 50%, free rotate to the left at 90, place below the crown layer.
Resize the pimptress bag to 40%, place on the right by the hand of the tube.

Resize the star curtain to 90%, paste on the mask layer, lower the opacity to 65%.

Resize the wordart Hollywood to 50%, apply Mura Meister Copies-Tiling (angle), change the tiling gap to 2. 
Then apply the same mask you used before, delete, merge group, change the blend mode to Luminance (L), move just above the mask layer.

Add any other elements you would like, make it your own.

Crop your tag to be sure no stray shadows are on the edges of your tag.
Once happy with it all, close off any backgrounds, merge visible.
Resize first, then add your copyrights and name.
 
That's it
Hope you enjoyed doing my tut.